Learn how to screenshot on Mac in many different ways and with many options. Solve the mystery of where they save and learn the screenshot methods.
Table of Contents
How to Take a Screenshot on a Mac With Shortcuts
Being able to take a screenshot on Mac isn’t one of the first things on most people’s minds when they buy a new Apple laptop. However, in the process of working away on something, or needing to send information over to someone, it is very useful to learn how to take a screenshot on a Mac. Knowing how to do it right off the bat helps to save time and benefits future work.
Taking a Screenshot of an Entire Screen
There are multiple different options when it comes to taking a print screen on Mac. The first one is to take a picture of the entire computer.
- Press the “Command” + “Shift” + “3” simultaneously.
- The computer snaps the picture of everything on the screen, dock, windows bar and all.
- The default setting sends the saved shot to be stored on the desktop.
How to Take a Partial Screenshot on Mac
Sometimes, there may only be a portion of a page that needs to be screenshotted. Taking a partial capture might also help to protect private information or other things captured on the full screen that shouldn’t be. Since there is no print screen Mac option, they made a new policy that starts by pressing Shift + Command + 4 to turn the cursor into a crosshair. After this, there are multiple ways to do this:
Hold Down and Release the Space Bar
This function helps to capture any window that is open on the computer.
- Turn the cursor into a crosshair.
- Then press and release the spacebar, this crosshair changes into a tiny camera icon.
- Move the camera cursor over to any open page.
- Click on it to take an image of only that specific one with a white border around it.
Continuing to hold down the space bar
Doing these ties in the shape and size of the area but allows it to be repositioned if needed.
- Before holding the space bar, drag the crosshairs to highlight a particular area.
- Don’t release the mouse, and press and hold the spacebar.
- Hold the space bar until it is where it needs to be, then release the mouse button to get it to snap the photo.
Press the Shift key
This method is best to do after making the crosshairs and clicking the mouse to make the selection, but before releasing it.
- Once the choice is made, the bottom will be the only side unfixed and can be adjusted.
- Hit the shift key again to make the right side adjustable next.
- Toggle between the two to adjust the size until it fits what is needed.
- Release the mouse to take the screen capture Mac.
How to Take a Specifically Sized Screenshot
Taking a specifically sized screenshot Mac may be useful for some people. Since there is no Print Screen Mac option, start by making the cursor into a crosshair. There are two numbers that show up beside the crosshairs. They represent the number of Pixels covered horizontally and vertically to give the selection currently highlighted. It helps as a general policy to display the current image.
- Simultaneously press the Command + Shift + 4 keys.
- With the crosshairs’ appearance, drag the mouse over the screen to show the pixel width and depth needed.
- This step is when the options, including the spacebar and shift keys, can be used to adjust the selection even closer to the required size.
- When the cropped section is the appropriate size, release the mouse to hear the camera shutter click.
Capturing an Open Window
If an entire page needs to be screenshotted, it is also possible to learn how to take a screenshot on a Mac, starting with bringing up the desired tab and ending with only the window displayed in the Mac screenshot.
Take a Screenshot of One Window
Getting a screen capture of a single window on a desktop can also be called a screengrab. To do this:
- Press the screenshot keys simultaneously.
- The crosshairs will appear. Press the Spacebar.
- Place the cursor so that it hovers over the window and shows up highlighted.
- Click the mouse to capture the image.
The resulting image will be of the selected window only. They show up with a shadow effect underneath.
Screenshotting Sans a Shadow
There are times when the need for the page image doesn’t include the shadow showing up with it. To take a picture of the window without a shadow, it takes a bit of acrobats. To do this:
- Press the Command + Shift + 4 keys.
- Crosshairs will appear. Press the Alt key followed by the Space + Alt.
- Place the crosshair-ed cursor over the window and click the mouse.
- The image will be taken without a shadow behind it.
The photo ends up on the desktop displayed on a .png.
Screenshotting a Specific Part of Screen Furniture
As can be seen from the instructions so far, the Command + Shift + 4 key combo comes in quite handy when playing with screenshots. It can also be used to take an exact picture of only a piece of screen furniture, for instance, a dropdown menu.
- Press the hotkeys.
- Crosshairs will appear. Follow by pressing the spacebar.
- Move the cursor directly over the furniture (a dropdown menu in this example) and left-click.
- The image is captured and appears on the desktop.
Dropdown menus are not the only applications for this handy hack. Take pictures of the bottom dock of the screen, the top bar, specific pieces in the top bar, wallpaper, or icons on the desktop.
Take a Screenshot of Touch Bar
It is also possible to take a screenshot on Macbook Pro of the touch bar only. Use the shortcut Command + Shift + 6, and a wide, slim screengrab of the touch bar will save to the desktop.
Capturing Timed Macbook Screenshot
Learning how to screenshot on Mac wouldn’t be complete without timed screenshots. Setting up a countdown can be extremely beneficial when a situation comes up that would otherwise require two things to be completed at once. Timing the shot allows for precious seconds, so action can be done and captured at the same time as it is capturing the photo.
The Quick Method
As always, there is more than one way to make something happen. Apply the shortcut below to quickly figure out the problem.
- Simultaneously press the Command + Shift + 5 keys.
- Click on the Options button.
- A timer selection pops up; choose 5 or 10 seconds.
- Next, select the shot needed: the whole screen, a specific portion, or a particular window.
- The timer starts up in the chosen area. When it hits zero, Macbook screenshot gets snapped.
Take a Grab from the Screen
Older versions of the Mac use a function called Grab to take a timed snapshot instead of pushing the improved shortcut version. Grab can be opened by pressing the Command + Space keys and then typing in Grab.
- Start by opening Grab.
- Select Capture and then Timed Screen.
- Click the Start Timer button.
- A red dial shows up beside the camera icon that displays the amount of time left until the picture is grabbed.
- This only allows a screengrab of the entire screen, but it can be edited later.
If Grab is opened, click Capture, and in updated models, there are options for high-resolution screen capture Mac, including smaller sections of the screen as well as the Timed Screen. Keep in mind that the timer only runs for 10 seconds, as shown in the red dial.
Using a Screenshot Command Menu
The ability to use a small menu called up by a handy shortcut is a relatively new feature. It allows the user to select Shift + Command + 5 to pull it up and then gives three screenshot Mac buttons. It also provides the choice to change where the shot gets saved and the delay in the picture.
- Photograph the entire screen
- Photograph a single window
- Photograph a specific portion
- Record the whole screen
- Record only a particular part of the screen
One of the default settings is that the Show Floating Thumbnail is enabled. A small thumbnail pops up in the corner of the screen to display the recently captured picture. This option can be turned off if it is not preferred. The screenshot panel may also be in the way during the photographing process. Remedy this easily by grabbing the left edge and dragging it away. Keep in mind that this convenient method, still in 2023, is only available on the macOS Mojave.
How to Screenshot on Mac Using Preview
Many Mac users are well acquainted with Preview since it is the default tool that gives someone the ability to pull up anything from photos to files. It has quite a number of other features that, although helpful, are not as well known but are a great tool to learn how to screenshot on Mac. To use Preview:
- Open the Finder tab at the top of the screen. Select Applications, which should appear on the left.
- Double-click the mouse on Preview for the app to open.
- When the app opens up, select File, which is located on the menu bar.
- This opens a dropdown menu. Hover over Take Screenshot on the Mac, and in the next menu, select the preferred screengrab option.
Preview is assuredly not the fastest way to take a Mac screenshot, with the keyboard shortcut easily surpassing it. However, it does have other advantages such as:
- Allows the user to choose where it is saved
- Enables making edits
- Opens the image
If this some of these are what need to be done immediately after anyway, Preview still ends up being the most convenient.
Screenshot on Mac Using Command Line
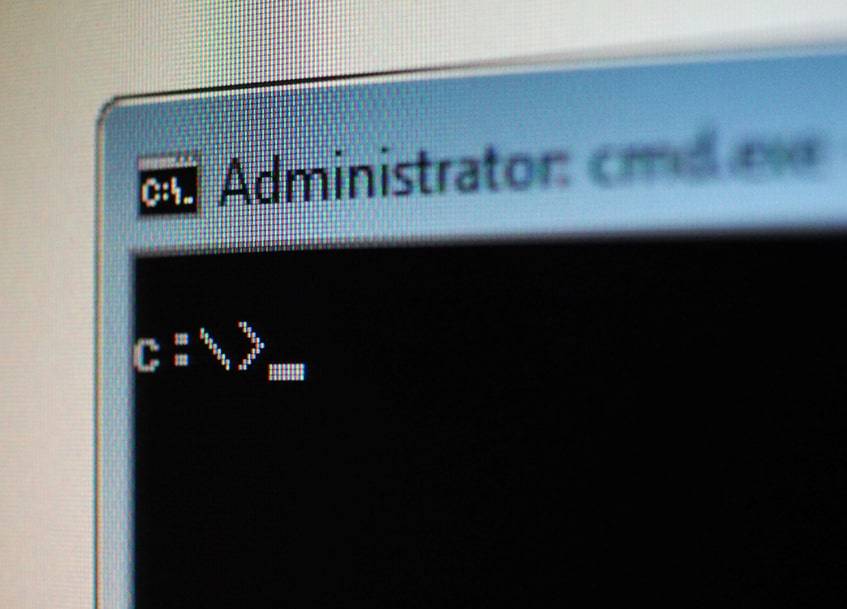
Putting to use the features available in Terminal to take a screenshot on Mac might be intimidating for some Apple users. However, for others, there is a definite pro, since it is more convenient than some other methods since there is no Print Screen Mac.
- Launch Terminal by holding the Space + Command keys and typing in Terminal.
- Type in: screencapture example.jpg. Doing this enables the computer to capture a picture of the screen and name the file as “example.jpg.”
Before the shot is taken, it is useful to know that the location of the image can be changed during the action. Choose a specific folder for the picture by typing in: screencapture ~/Desktop/solidimage.jpg.
How to Format a Screen Capture on Mac
Apple recently removed the Grab feature through an update to Mojave. This resulted in removing the simplest way to save a screenshot in a format other than a .png, such as a .jpeg or .tiff file. However, a screen capture Mac is still possible to do, just different than before, through a couple of ways.
Within Terminal
The terminal can be somewhat intimidating to utilize, but so long as it is done right, it is a quick way to screenshot windows.
- Open Terminal by pressing the appropriate hotkeys and typing in Terminal.
- Copy and paste the following: defaults write com.apple.screencapture type jpg
- Hit the Return key.
- Restart the Mac to see the changes in the files.
Using Grab
Gratefully, doing things the hard way isn’t always necessary. This is the case of an older version of macOS is in use. It means the update hasn’t happened, and Grab is still present.
- Start Grab.
- Select the Capture option and choose the type of image that should be taken.
- If a screenshot of a single window is necessary, click on it.
- The camera sound happens, and the screengrab is displayed. Name it and choose where to save it.
Editing a Screenshot
The option to get rid of the floating thumbnail in Mojave can be helpful when editing a screen capture on Mac. It goes away on its own in a couple of seconds or can be swiped away, but clicking it allows an editing window to open.
Options when Using the Thumbnail
The thumbnail can be quite useful, including quite a few handy features.
- Saves the screenshot to the desktop, Documents, or clipboard
- Shows up in Finder
- Deletes images
- Saves and closes
- Brings it up in Mail, Messages, Preview, or Photos
- Opens the Markup preview window which allows editing
Editing Screenshots
In the current, 2023, Mojave version, a thumbnail appears whenever a screenshot is taken and lasts for several seconds. It appears in the bottom right corner of the screen. Edit the screenshot can be done in several easy steps.
- Tap on the thumbnail to bring up its options.
- Markup comes up. It includes tools for highlighting, drawing, inserting shapes, text boxes, and a signature into the shot.
- Choose whether it is necessary to rotate or crop the photo.
- At the end of the editing process, select the Share button to send it with Message, Mail, or add to Photos.
Where to Locate Screenshots

The struggle feels like it should be mastered when the screenshot is taken, even without a Print Screen Mac option. However, sometimes this is only the beginning since it is moved to some folder or location that can be surprisingly hard to find.
Where to Locate Screenshots by Default
By default, screenshots automatically save to the desktop under the file name of “ScreenShot [date] at [time].png” or a .jpeg. In a MacOS Mojave or a later version, the default location can be changed in the Options menu of the Screenshot app. When the thumbnail pops up in these versions, it can be dragged to a specific place immediately as well.
If many screenshots have been taken, they start to clutter up the display. The Stacks app allows a user to group them together smoothly.
- Right-click on the desktop.
- Select “Use Stacks” with a left-click.
Change a Folder for Saving Screenshots
Trying to organize with Stacks or continuously deleting unnecessary screenshots to keep clear of the clutter can be irritatingly time-consuming. Instead, utilize the Mac feature of making a folder to save screenshots.
- Go into Documents, or whatever the desired location is for the folder, and create a new folder. Name it something that easily denotes the screenshots help inside.
- After this, open up Spotlight to access Terminal, or use one of Mac’s policy shortcuts talked about earlier in the article.
- Once Terminal is open, copy and paste this exact text, minus quotation marks, into the application: “defaults write com.apple.screencapture location“
- Ensure the cursor is blinking after the text, including the space after it, and drag in the previously designated folder to Terminal. Press the return key to complete.
- Take a screenshot on Mac to test it out and ensure it is going to the expected folder.
Save a Screenshot to the Clipboard
Use one of the combinations to take a screenshot on Mac: while holding down the Control button to take a screenshot and add it immediately to the clipboard instead of the default saving as a file.
Paste a Screenshot into a Document
Sometimes a captured image ends up in the clipboard on the Mac instead of being saved as a file. To fix this, go into the document that is currently being edited. Set the cursor to the location that the shot should paste into and hold down the Command and V keys simultaneously.
Troubleshooting Screenshots on Mac
Tech companies may try the hardest to get everything to work perfectly all the time. Sadly, it is not always the case for everyone, and troubleshooting may be a necessity to get everything running the way it should.
If Print Screen Doesn’t Work
There are a number of reasons that screenshots may not function the way one might expect them to. There are some reasons that are more common than others, though. One of these includes that the shortcuts have simply been disabled. To fix that, follow these steps:
- Find the Apple menu located in the top, left corner of the screen. Open System Preferences and select the Keyboard.
- In the popup, select Shortcuts.
- Locate the Screen Shots option along the left menu.
- Verify that they are active, functioning with the same key combos commonly typed.
- This is where a shortcut can get changed. To do this, select the option and type in a new key combination.
Empty Screenshots
Unfortunately, this strange problem is not entirely uncommon. Carefully check through the selection that was made before snapping the shot to ensure that the capture wasn’t for a very small, white portion of the page. If the right image was captured, then the chosen software may not be the best option for screen capture on Mac, and another method should be employed.
Frequently Asked Questions
How Do You Screenshot Netflix on a Mac?
To take a screenshot on Mac, including one on Netflix, when on a Mac, use the shortcut hack to turn the cursor into a crosshair and drag it over the area that should be the image.
How Do I Turn On Screenshots on My Mac?
If the hotkeys are not enabled, the print screening will be more difficult. It is possible to enable the hotkeys for a quick solution to getting screenshots.
- Select Apple Menu and then System Preferences.
- Select the Keyboard in the Preferences window.
- Click on the Shortcuts tab.
- Select Screen Shots in the left-hand list.
- Check the boxes to re-enable the cuts.
- Close down the window.
Many Marvellous Ways to Take a Screenshot on Macbooks
The Apple company is well-known for making many useful features and numerous options for just about any function available. This flexibility most definitely applies to take a Mac screenshot in a myriad of different ways.
If one or more of these methods works well for you, please leave a comment below, letting us know.


Comments